
 |
| Dirty nasty hinges and spring guards. |
 |
| Various parts after being cleaned with wire wheel |
 |
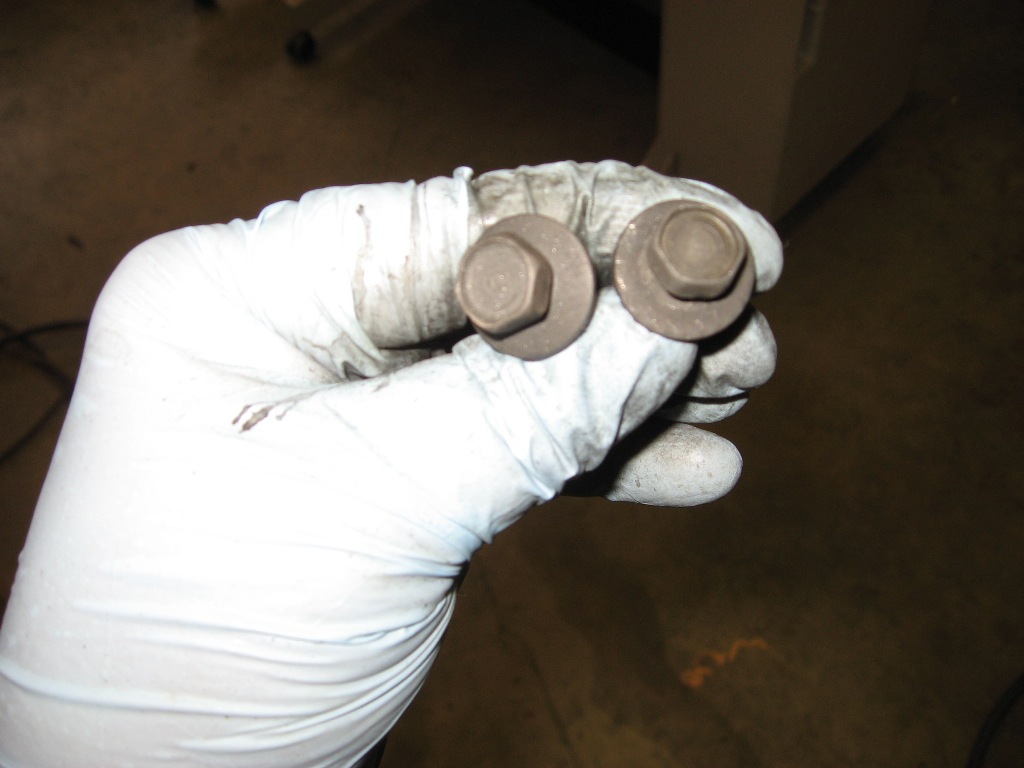
| Rusty bolts |
A little time in the blast cabinet and they're as good as new... well, except for any kind of rust protection. To date, I've been hitting them with a coat of etching primer and then stainless steel or flat black paint.
 |
| Media blasting does wonders |
I had known for some time that the hinges were supposed to be coated with that magical, ancient, lost coating called "phosphate and oil" last seen by some old guy in the basement of Ford factories sometime back in the 1800's or so. But how could I return to the days of old? Would I have to divine the spirit of some ancient alchemist? Journey a thousand days to the monasterys of the far Himalayas in search of a sect of monks that have held onto the lost art of phosphating car parts? Nope! Google! Like pretty much any recipe you look for on the Internet, I stumbled across dozens of recipes for the re-creation of Phosphate and Oil but the most information was not provided by car restorers but rather gunsmiths. The process is also called "Parkerizing". I'm not going into the who explanation of Parkerizing here because there are literally dozens of web sites that do just that including some Wiki pages where you can get all of the technical ugliness on some cold winter night when you're trying to get to sleep and warm milk just isn't doing it for you anymore. That's not to say I won't link out to some helpful threads and sites starting with a VMF Thread, a Caswell Plating thread, a Yahoo Tip, a BladeForums thread, an AKFiles thread, and a Northwest Firearms thread with pictures, and many more threads and pages of varying quality. Of course, if you want to see how the military originally employed the phosphate and oil process check out the Military Handbook of Phosphate and Black Oxide Coating of Ferrous Metals. I found their usage of Manganese Dihydrogen rather than Manganese Dioxide quite riveting. Update: Looks like Mustang Monthly wrote a howto in March of 2011.
One of the unifying concepts in all of these pages is that Parkerizing solutions consist of at least two components, the first being phosphoric acid, the second being either Zinc Oxide for a lighter finish or Manganese Dioxide for a darker finish. Thus the solution is either Zinc Phosphate or Manganese Phosphate.
We have two options for getting our calloused, welder-burned fingers on this mysterious potion. The first is to buy a gallon of concentrate from a retailer on the net for somewhere around $30 a gallon (plus shipping). The other option is to make it ourselves. Being the frugal consumer I am, I opted to go with door #2. The problem is where to get phosphoric acid and where to get zinc oxide or manganese dioxide? The phosphoric acid is the easiest, as it's also known as my old friend, Ospho which is 85% acid. Another option for the Ospho impaired is Jasco Prep-n-Prime. Now the manganese dioxide is not quite as easy but also not out of reach. It's widely used in ceramics and is thus available for about $4 a pound from a pottery supply store. But wait, that's not all, for a limited time only, it's available as the black stuff in your average C and D cell batteries if you're feeling that $4 is worth way more than your time. Zinc Oxide is the other possible component but many of the Parkerizing experimenters on the net have decided that the core of a US penny minted after 1984 is a good source for zinc. Ceramic supply stores also carry Zinc Oxide in powdered form though.
So how much of each component makes the optimal solution? Who the heck knows, I just went with my gut for my first experiment. I had noted that retail concentrates mix with water at a ratio of 8:1 so that's what I shot for as well. Since I didn't have any dead batteries laying around, I opted to go with the zinc phosphate version because I did have zinc in the form of a roll of Moss Out roof strip which the label indicates is 100% zinc. I decided to make up 24 oz of water with 3 oz of home-brew zinc phosphate (there's that 8:1 ratio). The amount of zinc I chose was just... well... for no good reason. I just cut 3 small strips and attempted to dissolve them in "pure" Ospho at room temp. First mistake, you pretty much have to heat the Ospho to get it to dissolve anything with any speed.
 |
| Ospho (left) and Moss Out Zinc Strip |
Not to be beaten though, I just tossed the strips on the water/acid mix and brought it to 185 degrees F in hopes that the zinc would dissolve "on the fly". It never did. I used a regular candy thermometer to monitor the temperature, a camp stove, and an aluminum bread pan with non-stick coating. Most of the web sites you'll find out there indicate that you must use a stainless steel pot/pan to do this but I didn't find this to be true at all. The acid did not attack the pan or it's coating in any way.
 |
| Ospho and water at 160 degrees F |
So I (carefully) tossed a handful of bolts and J nuts into the hot solution and watched it fizz for about 20 minutes. Stirring occasionally with a scrap of new brake line (no brake fluid residue in it). Just a short time in the heated solution was enough to turn the end of it black so it was looking promising.
 |
| This piece of brake line blackened within seconds when used to stir the solution |
 |
| An example of a freshly parkerized bolt |
 |
| Small scale setup |
 |
| These parts just came out of the bath. The latch striker is bare metal for comparison. |
 |
| A comparison of a professionally phosphate and oil bolt (right) with an experimental one (left) |
Here are the nuts and bolts (and hood latch striker) after the process. Again, the camera does weird things to the shades of the parts but some were lighter than others but when looking at them in regular lighting, the lighter colored parts including the hood latch striker were more of a dark gray to light black shade. One thing I had learned is that if the solution is set below 185 degrees, the black coating actually rubs off, over 185-200 degrees F, the coating is fixed and won't come off. As a side note, I had experimented with soaking parts in Ospho over night at room temperature and they certainly turned black BUT! the black coating rubbed off of them. The parts have to be brought over 185 degrees if you want your color to stay and actual Parkerization to take place. The amount of time to leave them in the cooker is another factor. Many web references suggest leaving them in until the fizzing stops but I got impatient at about 20 minutes and removed the parts. Now here's a question, I still haven't answered for myself yet. If the manganese oxide is supposed to do the blackening of the parts and this batch didn't contain any, why do the parts turn black in Ospho instead of zinc colored? I think that it's the sodium dichromate additive in the Ospho. Both sodium dichromate and manganese dioxide are oxidizing agents for other purposes so could it be this that's forcing the oxidation of the steel of the part itself and has nothing to do with the actual color of the manganese dioxide itself that makes steel parts turn black? I asked Ospho's tech support this question via email but have received no response. If it's as I suspect, Ospho probably needs no additives at all to get a dark parkerized finish.
 |
| A collection of freshly coated parts |
Here's the pan after I finished just to show that the aluminum pan nor it's non-stick coating took any damage from the acid at all. Stainless steel is simply not justified IMHO.
 |
| This aluminum pan was none the worse for wear afterward |
So, now that I've run a single experiment, I'm an expert now and decided to ramp up for production. I bought an enamelware canning pot for $10, 4 gallons of distilled water at a buck each, a gallon of Ospho for $20 (hmm.. that's not much less expensive than a gallon of commercial solution), and a pound of manganese dioxide for $4 from the only pottery supply, Georgies, about 20 miles away. My neighbors now think I'm running a meth lab... great.
 |
| The neighborhood meth lab? |
 |
| Preparing to make manganese phosphate |
 |
| Hot acid |
 |
| Manganse Phosphate? |
I then broke the #1 rule of acid/water solutions but adding 3 gallons of water to the acid. Chemistry people are facepalming about now but I survived, no splashes, flame-ups, death, nor destruction but now I'm obligated to regurgitate that old cliche, "don't try this at home". The chemist rule of thumb is, "add acid to water, not water to acid".
 |
| The solution ready to go. |
 |
| The hinge ready to go |
The solution was brought to 200 degrees. Note the oily film on the surface. I think it's because I forgot to clean and degrease the canning pot itself before I started.
 |
| 200 degrees. An oil slick? |
The hinge was lowered into the bath where it fizzed and gurgled and popped and buzzed for about 25 minutes. The fizzing decreased a lot but didn't actually stop. I'm just afraid to let it go until it stops fizzing as instructed on the net but I'm going to have to try that during my next experiment with a part not so expensive as hood hinges. When approaching the cooker, I wore my respirator, rubber gloves, and my coveralls.
 |
| Fizzing phosphate |
I finally pulled the hinge out of the bath and let the solution evaporate from it at which point I gave it a soaking with WD40 which is supposed to stop the parkerization. It's not the oil part of the phosphate and oil process.
 |
| Phosphate and.. WD40? |
Finally, I rubbed oil onto the hinge. I could feel a new texture in the metal which I can only assume is a crystalline matrix that is intended to absorb and retain the oil. I just used some compressor oil I had. Other guys use motor oil.
 |
| Done! |
After I had finished both hinges, I turned the heat to the stove off and let the solution cool to about 180 degrees. I had read that if you overheat the hinge springs, they'll be damaged by parkerization.
 |
| Freshly media blasted springs |
I decided to take a chance and attempt to avoid this by treating them while the solution cooled and to reduce the time they are left in the pot. So, I let them fizz in the pot while the solution cooled from 180 to 160 degrees. They came out blacker than the hinges but some of the black came off on the rag while wiping with WD40. Enough remained though such that the hinges still look okay. I really need to read more on how to properly treat the hinge springs.
 |
| Freshly treated springs |
The assembled springs. They have light and dark streaks in places. I'm fairly sure this is from passing them through the oil and contamination floating on the surface of the solution.
 |
| Hinges are done! |
Mounted on the car.
 |
| How do they look? |
Great! I'm done! You're probably wondering what I'm going to do with the solution now aren't you? Am I going to pour it into the sewer? Down the toilet? Throw it in the river? Get off my case ya damned hippy, I'm as environmentally friendly as Al Gore! I'm going to reuse it so cleanup consisted of letting the solution cool to about 100 degrees and then filtering it into individual gallon jugs. 2.5 gallons remained which means that more than 1/2 gallon evaporated during the process.
 |
| Storing the solution |
This is the residue that remained in the bottom of the pot. I think it's what's left of the manganese dioxide. I don't think it was ever fully dissolved into the solution which means I probably didn't make actual manganese phosphate. Update: It appears that sludge (scale) is a normal result of the Manganese Phosphate reaction.
 |
| What the hell? |
After cleaning the pan with an wire brush, it's good as new. Again, stainless steel is proven to be an unnecessary expense as the enamelware canning pot is none the worse for wear.
 |
| Good to go again |
I think the reason the hinges turned dark at all was due to the oxidizing agents in the Ospho and had nothing to do with anything I added to it. I'm going to go out on a limb here and say that whatever people add to the Ospho to try to make a proper parkerizing solution is really making no difference at all. I honestly think that the sodium dichromate in the Ospho is all that's needed to do a dark gray parkerization but that it's more of an iron phosphate rather than anything else. In fact, I think that if any of the online recipes have any merit, it will be the ones that call for a biscuit of steel wool in the pot. That at least makes a bit of sense for an iron phospate solution. Update: This assumption may be only partially correct as I was under that assumption that the scale left over on the bottom of the pot was a failed attempt to dissolve manganese dioxide in the acid but may actually just be a normal byproduct of the process. I now intend to do more experiments on a small scale with a higher concentration of manganese dioxide. Will post results here.
The results of this method of parkerization are good enough for me though. The parts really look darker in person than they do with my camera. I think that even though I've already painted my hood latch, I'll blast it and do it over as a more correct phosphate and oil as well as the shock tower caps and any other nuts and bolts I might recondition.
Update: After doing a bit more research, I stumbled upon a thread on natscience.com containing info on the chemistry of making manganese phosphate. One post in the thread confirmed my suspicions:
The "kitchen" methods circulating on the Internet about Parkerizing seem to be repetitions of untried recipes from chemically ignorant hobbyists. Those that report actual trials and results from these recipes wouldn't know the difference between a manganese coating and an ordinary iron phosphate coating that the acid will produce without the manganese dioxide.
So I suspect all that these hobbyists have been achieving in their kitchens is a simple iron phosphatizing process, and they are kidding themselves with the manganese.
So I suspect all that these hobbyists have been achieving in their kitchens is a simple iron phosphatizing process, and they are kidding themselves with the manganese.
Ouch! The truth hurts. Still, there's a "legit" method of making Manganese Phosphate out there but I'm going to content myself with Iron Phosphate for now.
Update 11/19/2010: I have received a response from Ospho:
My original question:
What is the purpose of the Sodium Dichromate in Ospho? I ask because some people use Ospho as a Parkerizing" solution to darken steel gun and car parts. It appears that even if unheated, Ospho will blacken these parts and leave a blackish residue which can sometimes be wiped off if a freshly sand blasted part is left to soak long enough. What is this black residue? Iron Oxide or some residue left from a chemical reaction between the steel, phosphoric acid, and Sodium Dichromate? I'd really love to nail down the perfect balance of Ospho and other components to make a "do it yourself" parkerizing solution (for my own personal use, not resale, although I'd post the recipe online for other do it yourselfers. Thanks for any insight you can provide.
Their response:
Dear Mr. Olshove,
The exact purpose of the Sodium Dichromate is proprietary information. However, as an old competition shooter myself I have used Ospho as a cheap form of "cold bluing". It doesn't last nearly as long as the heated solution of sodium hydroxide method - but, it works.
The black residue you mention is a combination of ferric and ferrous phosphate produced by the reduction reaction between the iron oxide (rust) and the strong phosphoric acid solution of the Ospho. These iron phosphates are much more chemically stable and therefore resistant to oxidation - extending the lifespan of your paint job.
Technical Director
Update 11/26/2010: After a couple more small-scale batches of fasteners, the solution is leaving a heavy gelatious sludge behind but the fasteners are coming out darker. I think it's either because of the water evaporating leaving a stronger solution or the acid is starting to attack the teflon coating of the aluminum pan. Best stick to stainless steel as recommended.
Update 9/24/2014: All of the parts I've modified using this method are still holding their color although bolts that have been exposed to weather during my use of the car are starting to show some rust at the very edges of the heads. Also, Maganese Dioxide is not necessary at all. Most of my treatments after this blog entry were done simply with diluted Ospho and no additional elements. Lastly, the pots and pans I used in this test all eventually destructed. I did eventually buy a stainless steel cook pot to do the work but the rest of the rig worked fine throughout the project including the camp stove and candy thermometer. I made quite a few bolt-holding rigs out of 1/4" screen or simply by wiring the parts together.
Fantastic post and great detail. I may possibly try this too, although probably not on the hood hinges as mine are shot. I've seen some folks paint the springs a different color to the hinges which can also look cool. I like the photo captions too...I'll have to figure out how to do that on my blog!
ReplyDeleteThanks! For the captions, just click on your blog photo and select "Add Caption" from the little menu that pops ups (the one that let's you select picture size and position).
ReplyDeleteBloody hell Alex... Your posts are such entertaining reads that it makes me feel I should not be doumenting mine - I feel, well, so, ummmm, inadequate :)
ReplyDeleteTruly great article with such detail - well done and learning so much from your blog
Thanks Mike but I hope you were just kidding about not documenting yours. Yeah, I ran on into some detail there. More than intended but I got a little obsessed with it. I'm all better now. :-)
ReplyDeleteThis is the kind of stuff that makes the "do-ers" cool! Whatever the outcome, piss on the critics. They rarely produce anything in the first place. As always, excellent work and documentation! Keep it up!
ReplyDeleteThanks! I really don't give much thought to the critics unless they give it in the form of advice that I can learn from. Otherwise, piss on em!
ReplyDeleteAmazing work Alex. I tried the Eastwood's blacking kit with good results as long as the part was really clean but your method is clearly the best method since you are heating the solution. I bought some hardware from AMK Products which sells full car or each piece nut and bolt kits. $$. So if you really don't have the correct parts, someone sells them. With the cold blacking kit I ended up finding that WD40 right after cleaning with distilled water kept it from taking on rust and then treating it with oil gave me better results. But really feel the life of the finish is based upon getting the temperature hot enough like you did. And of course distilled water only. Nice meth lab. Your neighbors might have smelled the phosphate stew and though what the heck? Don't forget to return the candy Thermometer back to the kitchen drawer. :-) Amazing work again Alex.
ReplyDeleteThanks James. Yeah, the AMK kit is the way to go if you don't mind spending the bucks. I've done a couple of batches of fasteners since this post and they come out darker and better each time. I think the solution is getting stronger as it evaporates. LOL! I bought the candy thermometer just for this. It's not going to the kitchen. :-)
ReplyDeleteHi, I've used a couple of lesser-known 'Ospho-type' phosphate products for rust removal/refinishing, at room temperature only, over the past ten years or so, and the 'gelatinous sludge' seems to be a regular feature when the standard product is used repeatedly.
ReplyDeleteI've seen the gel develop in plastic and glass containers.