Update 1/30/2011: A fellow VMFer (thanks Steve!) from a neighboring town was kind enough to take time to come over and examine my work. He has an exceptional amount of hands-on auto body experience and showed me how far off these patches are from being flush with the body among many other tips and tidbits of knowledge. His recommendation for cutting the patches out were to make much smaller patches. He recommended cutting out the indents right at the edges of the indention instead of an inch out like I did. The resulting patches would have been much easier to blend with the quarter than these that I did are. The result is that to blend these patches into the quarter will take quite a bit of filler over the entire rear section of the quarter which pretty much nullifies my purpose of doing this in the first place.
Sometime back in the 80's Ol' Rusty had endured a "restoration". This involved riveting thin sheet-metal patches over rust holes, welding reinforcement plate in the rusted-out inner rocker, slathering bondo all over the torque boxes, screwing aluminum and fiberglass sheets over the holes in the floor pans, and replacing the rear quarters. Well, at least they actually replaced the rear quarters but they used the incorrent panels from 68. It seems like a really minor thing but prior to 2/15 in 1968, the rear quarter reflectors were installed in indentions. After 2/15, the indentions were deleted in favor of flush-mounted side markers. Well Ol' Rusty was built on the 28th of February and should have the later flush-mounted markers. The restorers must have known that this was the case because they simply filled the indentions with body filler.
When I had the car media blasted, I had the blaster leave the filler in the indentions with the intentions to "top it off" so to speak and be done with it. I did this just before Christmas as evident in my
blog entry from 12/14/2010. The more I thought about it, the more of a bad taste it left in my mouth. The filler was upwards of 1/4" thick in the indentions. What if it cracked? What if it simply popped out because I didn't replace it with completely fresh filler? What if it caused the paint over it to bubble or peal? Then one day a fellow VMFer
posted a request for indention patches for a 68 Mustang. Although such a patch doesn't exist for sale, I felt that I could be of assistance and solve my indention problem as well so I went down to my local hardware store and bought a sheet of 20 gauge sheet. I had decided to perform an indentectomy.
 |
| Now THAT's gotta go. |
The first step was to clean out the indentions. I started on the passenger side and used my angle grinder with a knotted wire wheel. What a MESS!
 |
| All cleaned up |
I then measured the area about an inch around the indention and came up with a patch size of 11" x 4" and marked two patch blanks on my sheet metal plate. I used my new
Harbor Freight electric sheet metal shear and cut out the patches. I recommend this shear by the way. It works as advertised.
 |
| 11" x 4" squares. Just enough to overlap the indentions by about an inch. |
 |
| Ready for forming |
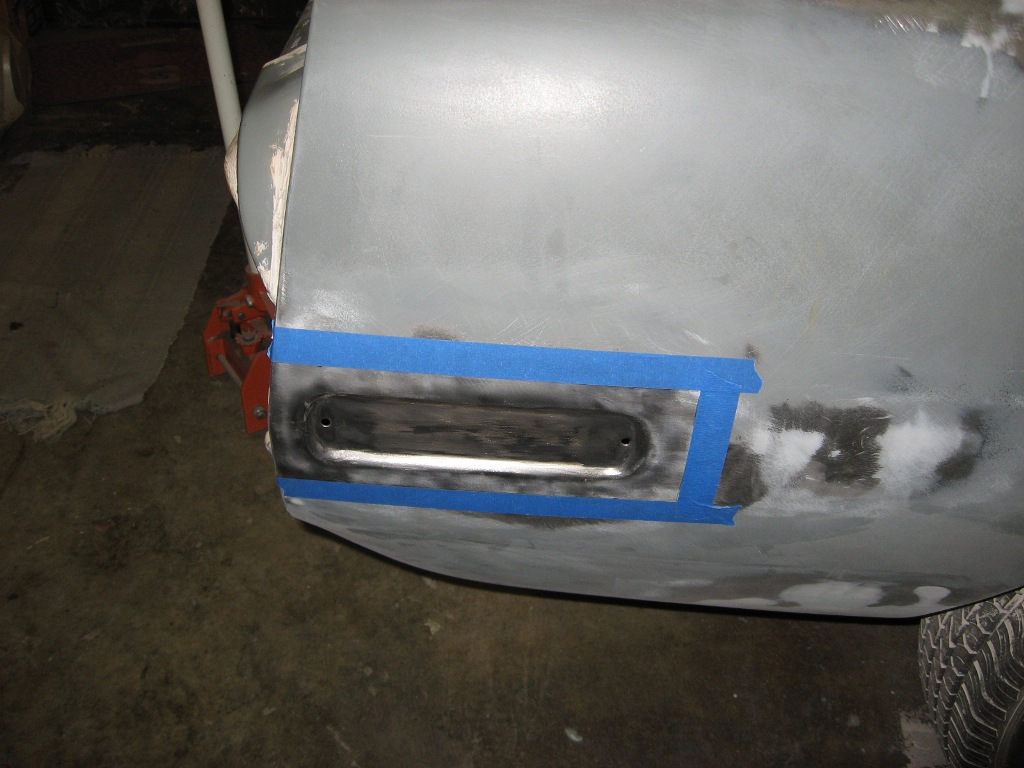
I marked out the area to be cut away with masking tape for visibility.
Before cutting, I had to put a slight bow in the patches to conform to the curve in the rear quarter. This was accomplished by using a section of my heavy floor jack's handle and a 1/8" bar stock to roll a slight curve in the 20 gauge sheet. After I got the curve started, I could use my hands to adjust the curve of the patch to match the indention area of the quarter.
 |
| My high-tech sheet-metal roller. |
Using thin cut-off wheels on my 4 1/2" angle grinder, I carefully cut out the indention out as best I could. My brain was screaming at me during this phase to just put the grinder down and step AWAY from the car. I had to just grit my teeth and have faith.
 |
| What the hell am I doing? |
 |
| Ack! Did I just cut a huge hole in my quarter panel!?! |
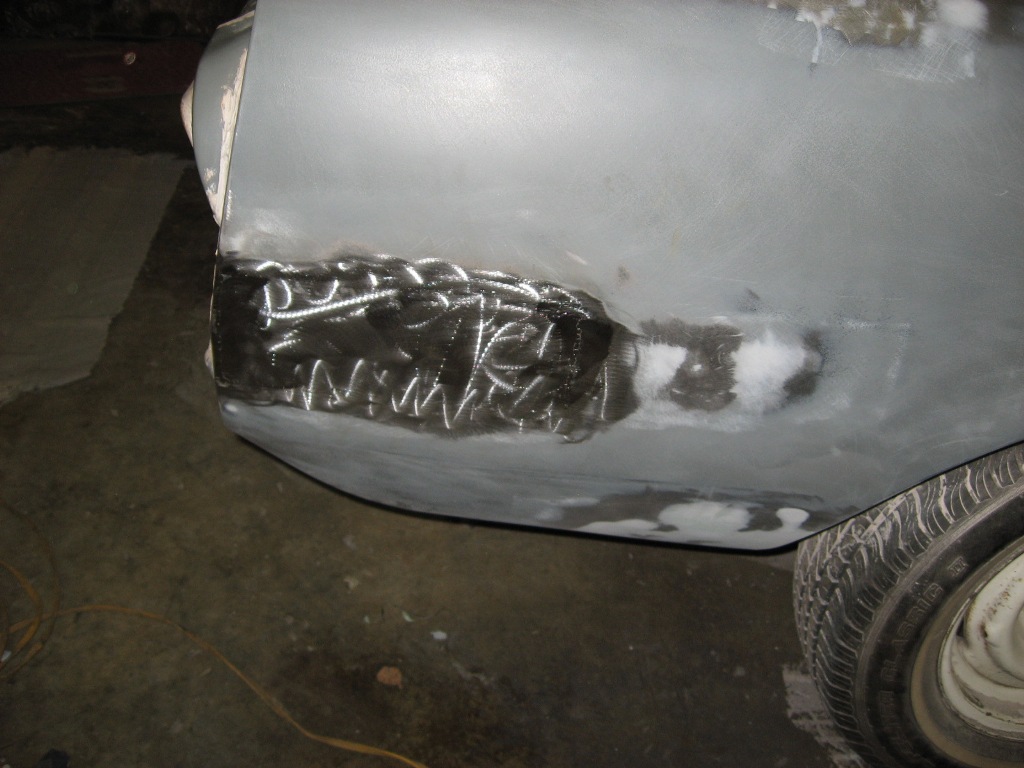
After many many minutes of fine-tuning the patch to the hole came the tedious job of stitch welding the patch into the quarter. I think a pro with a good heat-sink could have welded this patch in with a steady bead but the most reliable method for me personally is to just stitch it in one tack at a time alternating tacks about an inch or more apart to keep the heat dissipated in this way. Another way to weld in a patch like this is to use a heat-sink behind the weld like a copper or aluminum plate or even a wet rag but I didn't have a good way to hold such a thing up against the back of the joint.
 |
| Welded in. Phew! |
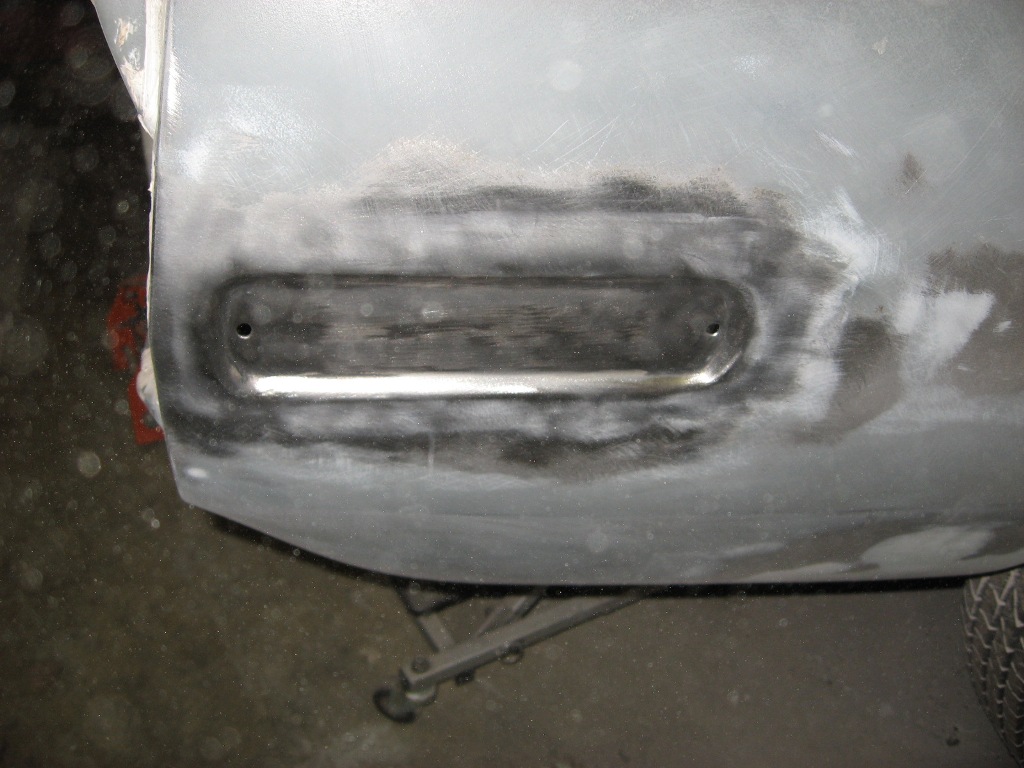
Finally, I ground the seam down with a grinding wheel and flap disk Something I've learned along the way is that grinding down welds will heat and warp sheet metal as surely as seam welding so I try to do the grinding lightly. Just letting the grinding wheel do the work and do not try to force it. If I see the metal turn blue under the wheel/flap disc, I back off.
 |
| Done. |
I followed the same procedure on the drivers side except instead of using a wire wheel to clean out the indention, I used my air chisel which proved to be the way to do it. The old filler literally popped out of the hole which also confirmed my fears of what might have happened had I left it the way it was.
The indentions were cleaned up to be reused and shipped to Maryland to start their new life as part of a father/son restore project.
So, that concludes Ol' Rusty's indentectomy and now she's not an "inney" any more.