I've dreamed of this moment for the past four years. ; the day that I could peek into the garage and see not rust but shiny new paint. I've spent the better part of the week peeking into the garage, inhaling those sweet sweet new paint fumes, and admiring the fruits of hours of hard work. You might think that new paint is the ultimate goal after spending years cutting, grinding, welding, and pounding on this car that you've become familiar with literally every square inch but it's only the beginning. The beginning of the end perhaps but still a beginning. This beast needs to go back together. Every remaining part needs to be refurbished or replaced and every tiny nut and bolt needs to go back into it's place. Yeah, the work has just begun and I felt that it had to start with interior paint before I could reassemble the dash, so I could install the wiring harness, so I could install the pedal brackets and brake system, so I could install the engine and transmission (and so on).
So, I hated to do it but I was granted a weekend of 60+ degree and sunny weather, a freakish event this time of year in Oregon, so I set to work covering up that shiny new paint and wrapping the car in plastic in preparation for interior paint. I also masked off the firewall so errant paint couldn't work itself into the engine compartment via the many holes. I then pulled the steering column and employed my loving wife to help scuff the well-cured DP40LF primer of the dashboard and interior door panels in preparation for some
NPD light parchment lacquer. The 68 light parchment is not exactly white like the earlier years but more beige but still quite a few shades lighter than the saddle color for the year. After scuffing thoroughly, the metal was scrubbed with metal prep and then gone over with a tack cloth.
The NPD lacquer paint comes in spray cans but the quality of the spray is fairly decent with no splattering or sputtering once you got it going. So, if I was between spray sessions and let the can sit for more than a couple of minutes, I learned to pre-spray onto a cardboard target to clear the nozzle and get the pattern clear before spraying. The trick to lacquer appears to be very thin coats. If you spray it on even a little too much, you'll immediately be rewarded with fish-eye and drips and quickly learn your lesson to take your time and do many thin coats again and again. Your index spray finger and forearms won't thank you though.
 |
| Dash (Before) |
 |
| Cheap labor scuffing the doors. Thanks hon! |
 |
| Stripped the old paint off the glove box lid (front). |
 |
| Glove box (back) |
After I had laid down a couple of coats, a blemish had made itself very clear. There was a spot to the right of the glove box hole where I had caught the edge with my angle grinder and roughly pounded the metal out and forgot about it. It was very noticeable so I shook my head in disgust, got my wire wheel and took off the paint and worked the spot with a slapper and various dolly's until it was fairly more smooth and then broke out the body filler, filler primer, and sealer. I spent some time blending the new primer into the existing paint and resprayed.
 |
| Yuck! |
 |
| Crap... |
 |
| I come from the "lay it down thick and let the sanding block sort it out" school of body filler. |
 |
| I think a pro would have left more filler and contoured it better. |
 |
| After sealer but before blending. |
 |
| Good nuff. This is why I let somebody else do the paint/filler work. |
 |
| Done. |
That pretty much completes the dash/door paint. I didn't wet sand or clear but I might still. I'm not sure I want a shiny dash yet. Now, all that was left to really bring it home is the steering column. This is one complicated beast in itself with at least 10 individual parts that will each need paint. I took a lot of pictures during the disassemble process. That big black segmented looking thing on the bottom end of the steering tube is a big ol' hunk of shrink tubing that is protecting the collapsible safety portion of the column which is one of the reasons I prefer the 68 Mustang over the other "spearomatic" years. Sometimes, this tubing gets beaten up and becomes unsightly for the more discerning restorer. If yours is beyond saving, you might check out
Sven's blog. He does a hard-core restore of a steering column that includes giving away his secrets of how to replace this shrink tubing yourself and where to get it. It's quite an impressive read and I had fully intended to do a copy-cat job on my own but upon inspection, my shrink tubing just isn't unacceptable to me. A bit of lacquer thinner cleaned it right up.
*******
It would be great if I could just use the same paint on the column parts that I had used on the dash and doors but there are two soft pads, the plastic steering wheel, and an emergency flasher bezel to worry about as well. For those, I purchased a
light parchment dye from CJ Pony Parts. This stuff is meant to be used on "soft parts" and plastics. Before I committed to spraying all of my soft and plastic parts, I felt the need to do a test. The part I chose to test on was the center steering wheel pad. This part is available in reproduction for around $27 so I felt the risk was minimal plus it's small enough to strip if I had to start over. I cleaned it with soap and water and then scrubbed it with lacquer thinner although there's an official style vinyl prep that I didn't bother to purchase. It turns out that the lacquer thinner removed the paint from the pad but didn't damage the pad itself (bonus!). Don't trust me on this though because it's not like I soaked the pad in thinner or anything. Rather, I just rubbed it with a rag with thinner on it so proceed at your own risk. I worked it pretty hard though and got it very clean which I think is the key to spraying vinyl parts.. clean clean and then clean some more. Spraying vinyl parts appears to be subject to the same rules as lacquer, many thin coats. Again, if you go too fast, you'll get fish-eye and runs.
 |
| In the beginning. |
 |
| Pulled off the firewall mounting bracket. Oh rust, how I've missed you... not. |
 |
| Huh.. this looks vaguely like all my toys when I was kid for some reason. |
 |
| This is the collapsing joint that makes the steering column safe. The inside shaft slides into the outside shaft and thus collapses if you smack it with your melon. Note the plastic sheer pins. Wouldn't take much. |
 |
| After the paint was stripped from the column. Note the discoloration on the left. Presumably from the heat used to shrink the shrink tubing. |
 |
| Cleaned up center pad. |
 |
| Center pad after paint. |
 |
| The center pad passed the "fingernail scratch test" so I moved onto the larger parts. |
 |
| All of the metal parts after blasting and primer. |
 |
| Painted an ready to reassemble. |
You might notice in the pics above that the wheel pads are very white compared to the other off-white light parchment painted parts. That's because I soon realized that the CJ Pony dye is the wrong shade! It's the earlier light parchment. So, I cheated a little. I read the NPD lacquer can more carefully and it clearly states that it's suitable for metal and hard plastic parts. Loop hole! I utilized the CJ Pony Dye as a base coat, a kind of primer, and then sprayed two coats of NPD interior paint over that. This wouldn't fly for soft items like seats though since the NPD paint would pretty much crack and flake away if it were flexed too much.
The following pics are pretty much just the assembly sequence of the steering column for reference. Skip to the bottom two pics for the finished dash.
 |
| Freshly painted signal and bearing housing with the bearing inserted |
 |
| How it all aligns. |
 |
| There are these two square-head bolts that stick through the back side of the signal housing. See that slot above the bolt head? That bolt head drops into the slot in the tube and is used to pull the cone against the bearing housing (in addition to the two sheet-metal screws). See below for alignment. | |
 |
| This is an inside view of those square-head bolts inserted into the slot in the tube. To get these started, you have to insert the bolts into the signal housing holes and barely thread their nut onto the first couple of threads to keep them from falling out. Then it's a painful coordination to cock these bolts up over the tube and into their slots. Then pull the two halves together and tighten the nuts. |
 |
| The assembled housing mounted to the cone and tube. The two silver nuts are for the square head bolts from above. Then there are the two black-headed sheet metal screws. |
 |
| The signal switch screwed in with three screws. |
 |
| These are the power tracks from the underside of the steering wheel. They're upside down here but this shows the alignment of the three rings. |
 |
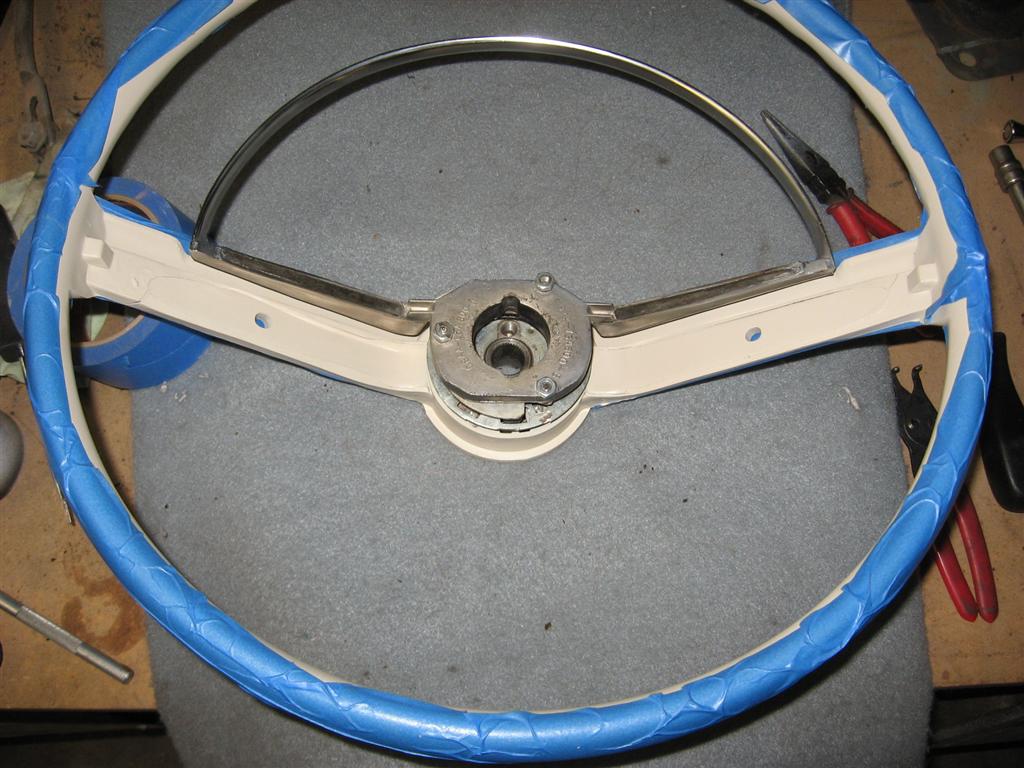
| The three rings (power tracks) on the underside of the steering wheel coated with a layer of "Bulb Grease". |
 |
| The horn side of the steering wheel with the first component locked into place. There's a spring below it and it's pushed down into a slot and rotated to lock it into place. BTW, those three studs are inserted into the horn ring but they're definitely not original. I might have to buy a repro horn ring contact kit. |
 |
| The horn ring insulator. |
 |
| Horn ring contact plate. |
 |
| Horn ring contact rubber spring. |
 |
| Finally, the horn ring itself bolted on. |
It looks like CJ Pony Parts (and others I'm sure) carry the "
Horn Ring Contact Kit" with the above components if needed.
Finally, the steering column was bolted into the dash and firewall
 |
| The firewall seal and mounting bracket. |
 |
| This is how the dash clamp goes together. It's all based on the pedal bracket that has to be in before hand. |
 |
| The firewall bracket screwed in. These are the original screws and their mounting pattern. Why it was done this way with these particular (gold??) screws, I have no idea. The bracket has 4 regular stamped mounting holes, one at each corner, and then two seemingly randomly driven screws. Strange. |
And now for the completed product:


Alex,
ReplyDeleteAll I can say is WOW! HUGE kudos from out here in Motown! That work looks absolutely factastic and your car is going to look stunning in that color combo. How much do one of those "wife" tools cost anyway? The last one I bought cost WAY too much, hated the garage ambiance, wouldn't get dirty and couldn't even weld! LOL! (Serious kudos to your bride as well!)
LOL! Thanks Sven. The wife is a great help and I'm lucky to have had her support through this project. Hmmm... I'm going to have to teach her to weld. :-)
DeleteAlex, that interior/exterior color combo is off the hook! I haven't tried using the "wife tool" like that yet. She's helped with video and occasional third hand work. I'm afraid if I teach her to weld, she'll like it so much I won't get my welder back...or have to get another car. Hmmm...maybe that's not such a bad idea after all!
ReplyDeleteLOL! Thanks Dennis. Heck, if my wife expressed any interest in welding, I'd give her my welder. :-)
DeleteHmmm... another car...
Beautiful Alex - what a looker!!!
ReplyDeleteSven - a wife that can't weld ?!? Man that is tough liv'in Brother! :)
rj
Thanks RJ!
DeleteIt's all coming together Alex, nice work! When I'm over that way, I will have to stop by and check it out.
ReplyDeleteMy wife helped wet sand your car:) She sanded her fingernail edge off lol Said I need smaller gloves for her:)
Steve
Thanks Steve!
DeleteYour wife's contributions to the cause are very much appreciated. She's an awesome lady! :-)
Awesome work there Alex! Great color combo. I'm on my second "wife tool" since I started this project. The first one left because I spent too much time on the stang. Imaging that. Great work, pics, and blog!
ReplyDeleteThanks James! Sounds like that first one didn't have her priorities straight! :-)
DeleteAlex, thanks for the great instructional article! It gives me something to look forward to on my stang.
ReplyDeleteMike
Hey! You're welcome Mike. Thanks!
DeleteJust picked up the link off VMF. Getting ready to clean/repair/paint/dye my 69 Mach steering wheel and looking for information on how to...thanks for the photos and process.
ReplyDeleteCopperace
You're welcome Copperace!
Delete