Okay so the car is out of the shop so out of sight, out of mind. Then there remained this rusty, grease-caked hunk of cast iron that Ford so affectionately calls a "289". This 460 pound sludge-bucket has been occupying prime real estate in the corner of my garage for the past 3 years and its day of reckoning is upon us. When last driven, I swore that this motor, despite it's overt ugliness, ran fine. I don't recall it burning any oil, missing, or any other indication that it was anything other than a perfect specimen of engineering. Therefore, my goal was to scrub it down, grind the rust away, paint it, and toss it back in the car. Oh those happy dreams of the ignorant newbie.
 |
| Here's what we started with. The quintessential "before" pic. |
I first plugged all of the ports with old socks so water and other non-engine-friendly fluids and particles could not get in. Then I sprayed the engine down with a can of EZ-Off HD oven cleaner since it was heavily touted in the VMF discussions as the cure-all for cleaning up an engine and waited for about 30 minutes for it to work it's magic. I cranked up my power spray and rinsed off the remaining goo, flipped the engine upside down, sprayed on some more oven cleaner and hit it with the power spray again.
 |
| All foamed up with EZ-Off HD oven cleaner. |
I let the engine dry and rolled it back into the garage.
 |
| Well, it's still rusty but it looks like the grease is gone. |
In my undying confidence in the perfection that is my 289, I opted to confirm my good fortune by constructing a device called a "Leak Down Tester". This thing can be made from about $30 in hardware store air compressor parts. Instructions to build an operate one can be had from various source on the net such as
this and
this. This thing basically works opposite the way a compression tester works only instead of reading air that is compressed by the engine, it reads air that compresses within the cylinder of an engine from an air compressor source. I chose this instead of a regular compression tester because it can be used without cranking the engine and, as you can see, my engine is not crankable at the moment.
 |
| $30 of parts put together just right = A Leak Down Tester |
The business end of the tester consists of a spark plug that I gutted and welded a 1/4" air compressor air hose barb to which is screwed into the cylinder spark plug hole. The other end of the hose connects to the tester which is connected to the air compressor.
 |
| A gutted spark plug welded to a hose barb. |
Testing is begun on cylinder #1 which is set to TDC on the compression stroke.
 |
| TDC on the compression stroke. |
The tester is calibrated to 100 PSI on the gauge, engine side hose detached. The engine hose is then attached and you can see the resulting pressure difference on the regulator. A good cylinder will show about 80-90 lbs PSI on the gauge indicating that very little air is being lost. Mine showed... a bit less. 20 lbs, indicating that either I'm on an exhaust stroke or I have some serious cylinder problems. The latter proved to be true. Oh the disappointment of a newbie brought to a hard realization. All cylinders indicated a massive loss, by the way. Not just #1. Only two cylinders maintained 40 pounds of pressure which still fails the test badly. At this point, I'm thinking stuck rings and/or stuck valves so I came to the decision to do a complete rebuild of the engine.
 |
| Bad news. |
Fortunately, I had bought a book about a year ago called
How to Rebuild Small-Block Ford Engines by Tom Monroe. It can be had from
Amazon for about 15 bucks. It comes highly recommended by Ford enthusiasts on the various Mustang forums. It's really easy to read and follow and I recommend it as well.
I started the disassembly with the water pump.
 |
| Several well-placed rusty old bolts hold the pump to the timing cover. |
Unfortunately, I broke off two bolts in the process. Oh well, I'll get them out of the timing cover housing later with the creative application of heat from a torch. The cover came off next... but not really. It turns out that I needed to pull the harmonic balancer/main pulley first.. doh.
 |
| Um... the harmonic balancer needs to come off first genius. |
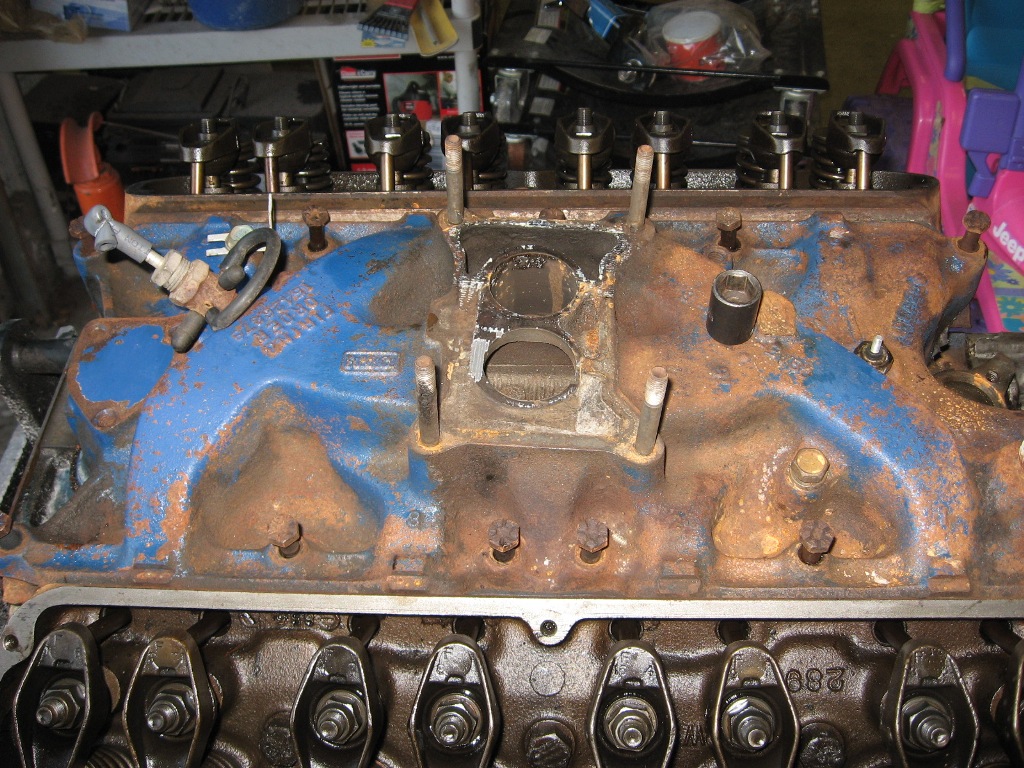
I had already pulled the valve covers to confirm that the valves were set correctly during the leak down test so next I moved on to the intake manifold. About 12 bolts later and it lifts off. This particular part is going to be replaced with a four barrel version.
 |
| Yanking the intake manifold |
Okay so I inspected the valley and found not only nasty sludge but something just wasn't right about the push rods on the cylinder #8.
 |
| Sludge Valley, OR |
Upon closer inspection, it appeared that the rod is... bent? Wow, that can't be good.
 |
| WTF? |
I loosened all of the rocker arms and pulled the rods and examined them. Actually, they all look a little "not straight".
 |
| One of these things is not like the others. |
I then pulled the heads. I was sure that the valves would be all boogered up but, to my uneducated eye, they look fine. I'm still going to rebuild them though.
Next, I inspected the cylinder expecting to see all kinds of horrible scoring, melted piston tops, carbon build up and... well, they don't look all that bad to me either.
 |
| Not seeing horrible disfigurement. |
Examining the cylinder walls. No scoring but could be considered worn anyway? By the way, I'm noticing the pretty red color within the water jacket. Yet more
rust! I'm thinking this block is gonna get a good dipping.
 |
| Don't know if this is bad or not. |
Next came time to pull the harmonic balancer and main pulley. I needed a way to block the engine from rotating so I clamped a clamp on each side of the flex plate. The sock is to protect the threads of the clamp when butting up against the engine stand arms.
 |
| Clamped down. |
I used a 1/2" breaker bar and a jack handle extension. It was a good fight but the better man won.
 |
| Pulled the main crank bolt. |
Okay so now the bolt is off but the harmonic balancer doesn't quite just pop off does it? Well, I didn't have a puller large enough so I... improvised... with a slide hammer. I'm pretty sure this is a no-no because of the stresses it would place on the crank bearings. I was pretty proud of my ingenuity at the time but as I thought about it in bed that night, I came to regret it.
 |
| Got it off and NOW the timing cover can be removed. |
Here's the timing assembly. It came off next.
 |
| Timing assembly. Looks like a lot of play to me. |
I turned the engine over to pull the oil pan and was greeted with a large puddle of coolant on the floor of my garage. Nice. After I cleaned it up, I decided to enlist precautions.
NOTE: Most people remove the flex plate/flywheel BEFORE they put it on the engine stand. I left it to help me stop the crank from rotating and/or making it easier to rotate the crank while tearing down the engine. Although, the block plate did get in the way sometimes. It wasn't too difficult to remove when it needed to come off.
 |
| Still a lot of fluids in there. |
Here's how the crank assembly looks. Hmm.. what's up with the oil pump pickup screen?
 |
| Cranky engine crank |
Yuck! The pickup screen was packed with all kinds of crap.
 |
| Not picking up much oil these days by the looks of it. |
I noticed there were some plastic thingy's stuck in among the debris there too.
 |
| Any idea what this stuff was? |
I got as far as removing piston #1. The piston rod bearing surface looks a bit scored.
 |
| Needs machining me thinks |
After removing the piston rod cap, I pushed the #1 piston out of the cylinder. Monroe's book indicates that I should need to ream the ridge from the top of the cylinder sleeve first but the piston just came right out. And then the top compression ring fell to the floor. That explains why the compression wasn't so great (on that cylinder anyway).
 |
| #1 piston with it's broken ring. |
It looks like the #1 cylinder walls are scored a little bit by the broken ring. The ring itself is kind of smooshed on the outside edge.
 |
| The cylinder and broken ring. |
That's all I got done to this point. I still need to remove the remaining pistons, the crank, the cam shaft, the flex plate, and the freeze plugs.
 |
| This is what the block looked like after this entry. |
To be continued in
Seeking Motorvation Part 2.


Dear Victim, Sorry to hear about your motor. But it is an antique car, and we have to work with that. They make a harmonic balancer puller that works well. The donkey's I got my car from used electrical tape to plug up the PCV valve because it was rattling(means replace PCV) and the motor didn't vent. But it still sounded good when it ran. Regards, another victim. :-)
ReplyDeleteLOL! Thanks for the support fellow victim. We should start to hold support group meetings where we stand up and say, "Hi, my name is and I am the victim of a classic Mustang."
ReplyDeleteHa! Considering... I think this is our support group! LOL! Thanks for the support!
ReplyDeleteThose little pieces from the oil pump looks like something from a carb vacuum hose adapter. It might have fell into the engine somehow.
ReplyDeleteAh maybe that's what it is James. I didn't see any part like it in the engine. It had to have been dropped in.
ReplyDeleteThis entry reminds me of when I rebuilt my 289. I used the same book that you're using, and I found it invaluable. I still refer to it. As my wife would remind me when I was rebuilding my engine, "Think of it as an adventure."
ReplyDeleteI enjoy your blog and admire your skill.
LOL! Thanks John.
ReplyDelete