

Unfortunately, it's STILL April 1, also known as April Fools Day, here on the West Coast of the USA so I thought I'd try to pull off a little Microsoft Paint action. How did I do? Fool anybody? I hope not because that Shelby is NOT a convertible and, sadly, is not mine.
On to the fender work!
The passenger fender was just a tad worse off than the driver side. Note the severe cancer in the lower rear. Again, the previous restorer just stuck good metal over the top of rusted metal without treating or painting anything so this is the long-term result.

Here's a close-up of the major damage. Looks like it got hit with a 12 gauge shotgun.

From the inside you can see that the inner brace and entire bottom 2" or so are completely obliterated.

The brace patches are designed to be welded over the original brace. I didn't do this on the driver side opting instead to attempt to use the patch to directly replace the original sheet metal. That approach took a lot of time and manipulation of the patch to fit correctly. So, on this side, I'm going to use the patch as it was intended. I'm just going to use as little overlap as I can while maintaining structural integrity.

Here's a quick note regarding the placement of these braces. After I had already finished the driver side fender and had tacked in the passenger side brace, I had an "OH S**T!" moment at about 4:00 AM where I realized that I SHOULD have pre-measured the location of the inner brace mounting hole in relation to the some part of the brace (such as the top) but it was too late, I'd already cut my one measureable mounting point off when I'd patched the driver side fender. So I posted a thread on the VMF requesting someone to take the measurement for me. The first responder was VMF member free67conv who gave me a measurement of 25 to 25 1/16". Based on this and a few other measurements I received from other helpful Mustang owners, this brace distance should be between 25" and 25 1/4" but I'd error more toward the 25" end of the spectrum.

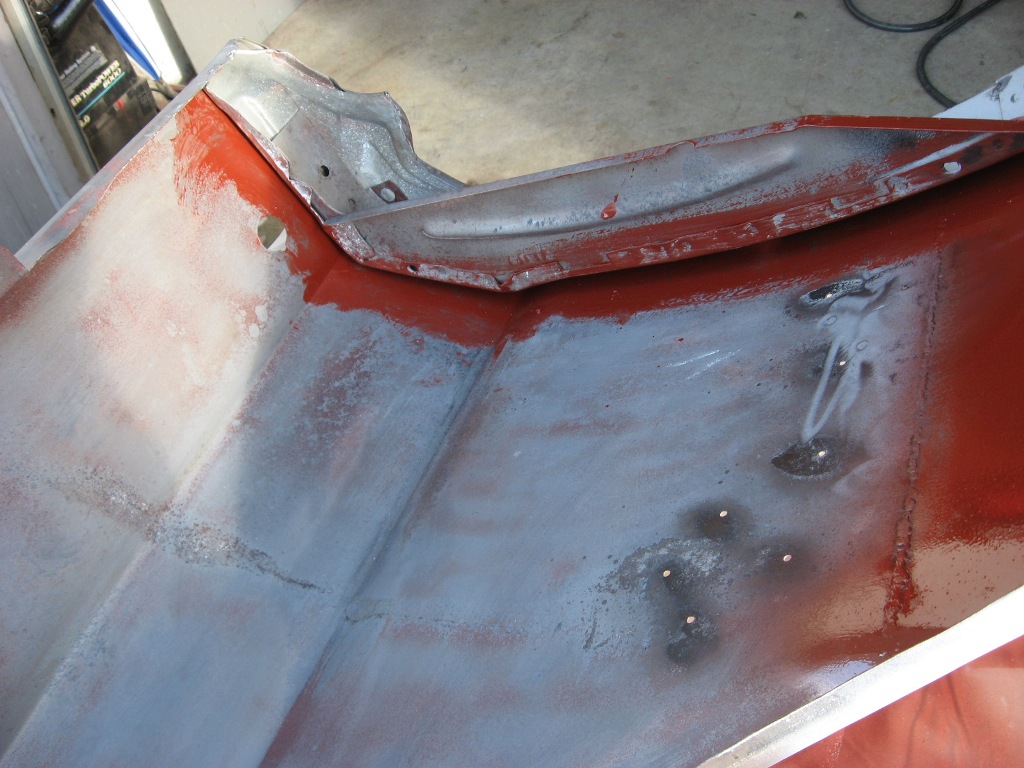
In preparation for the patch, I cut away the rusted portion as far back to good metal as I needed to.

Before I could weld or fit the brace patch, however, I needed to remove the bad skin sheet metal so I could access the other side of the inner brace. First, however, I was careful to check the emblem mounting holes to determine what needed to stay and what needed to be filled. Sure enough, I had 4 spare holes.

I was then ready to mark the fender to cut away all the way back to good metal which just happend to allow me to keep the emblem mounting holes.

I cut along the tape line with my angle grinder 1/16" cutting disk but I left the rolled fender lip in tact to use as a reference.

I then placed the fender on the car and test fitted the brace and clamped it in place. This method put the brace mounting hole at 25 1/16" as per the measurement discussed above. The driver side, on the other hand was closer to 25 1/8" so I smacked it with a BFH until it complied with the specification.

I then primered the patch on both sides and primered the end of the original brace where the patch would be welded over the top of it. I really hate overlapping metal like this but when I have to I feel better when there's protection on the inside surfaces. I then clamped the new fender patch panel in place for a test fit.

I used the test fit to determine where to cut the patch. I marked the position of the butt weld joint on the new metal using a pencil and then taped the line for visibility when I'm cutting with the angle grinder.

I then made the decision to keep the original wheel opening lip in place to continue to use it as a reference so the new patch would be positioned correctly and also to avoid having to mate up two lips of differing height. The patch panel had a wider lip which I could have just cut narrower and butt welded it. However, I had a feeling it just wouldn't flow as nicely as if I'd retained the original opening.

I drilled 3/8" plug weld holes to match the end of the inner brace flange. I was then ready to align the patch panel and hold it in place for welding.

The panel was then tacked into place while keeping the edges of the butt weld flush with one another.

The seam was then welded with a series of dozens of tacks and very short "stitches". I was very careful not to heat at any one place too much. For instance, I would tack the wheel lip edge and then tack the other end of the fender butt joint and move along back and forth methodically. This is the largest patch I'd ever attempted so I wanted to be careful and do my best not to warp the panels.

Here's the inside after the weld. I used a body hammer and dolly to move back and forth along the back edge of the fender and roll the patch flange over the inside brace edge to attempt to match the rolled edge of the original section of the fender. Another "fun" task was drilling oval shaped holes in the front and rear mounting points.

Here's the completed patch. Body filler will be needed to smooth out the seam but I think it looks pretty straight.

Next I patched a small hole near the side marker light but it wasn't nearly as interesting as the driver side marker light patch so I'll skip it.
The headlight bucket was no better off than the passenger side one. I cut the spot welds and removed it like I did for the other side.

As with the other side, I made a crude patch with my crude tools and crude skills... crudely.

And welded it in.

As with the driver side bucket this one needed an additional little patch on the side. Then I ground the surface rust away and ground down the welds a bit.

The fender and bucket were then treated with Ospho rust converter, rinsed, and rubbed down with lacquer thinner.

I brushed ZeroRust under the brace.
And then painted the inner fender and entire bucket with ZeroRust thinned with lacquer thinner.

After the paint dried, I realigned the bucket with the fender using clamps and clecos.

And then plug welded it back together and ground the welds down.

Finally, I test-fitted it back on the car! It's may not be a Shelby but at least it has fenders now!

It might be interesting to note that this side only took me about 10 hours whereas the other side took me around twice as long. I think some of it has to do with using the brace patch as it was intended, a less involved patch for the side marker light hole, and prior experience banging out the bucket patch.
That is some awesome metal skills! Bravo! And I thought I was stickler for detail. I love the BFH comment. Everybody needs a big hammer.
ReplyDeleteAnd I don't think any restoration shop would take pity on you(or give you a Shelby). They would hire you! :-) Great April Fools joke and Happy Easter Alex.
Thanks James!
ReplyDelete>> The driver side, on the other hand was closer to 25 1/8" so I smacked it with a BFH until it complied with the specification.
ReplyDeleteLOL... As I said in an earlier email Alex: If it don't fit force it. If it breaks it needed replacing anyway!!!
Well done and keep at it...
Words of wisdom, Mike, Thanks!
ReplyDeletewow great job brother,
ReplyDeleteU are have multi skill here to complicated job.
above job need welding skill,fit-up dimension,painting and corrosion knowledge. and finally you done.