I left off with the heads shipped off to the machine shop for inspection. The base fee for both heads was $115. It included cleaning, inspection, grinding the seats and valves, replacement of the seals, and paint. However, the machinist said that if the valves were recessed much, bent, etc., the tasks for correction would increase the price incrementally. He called me back the day after I dropped them off and informed me that several of the exhaust valves were slightly recessed into their seats. For you see, the valve seats in these old heads are soft. They relied on lead in the ancient fossil fuels of yesteryear to keep them lubricated and prevented recession (squishing the valve into the seat). Well, as Frankenstein once said, "Lead Baaaaaad"... I don't know maybe I'm thinking of Woodsy Owl or something but the point is that "they" took it out of our gas around 1996 so these old engines started beating themselves to death. Modern engines have hardened valve seats to deal with unleaded gas. Long story short, I had them go ahead and install hardened exhaust valve seats. Three days and $250 later I had my heads back all spick-n-span.
 |
| OMG, they're beautiful. |
And thus came my first experience installing cylinder heads on a V8. So, I cracked open my favorite, aforementioned "How to Rebuild Small Block Ford Engines" by Tom Monroe, and sought the page on installing the cylinder heads. Well, to paraphrase, it said something like, "put the gaskets on and then put the heads on and then bolt them suckers down". I looked at the page and looked at the heads, and looked at the engine block and noted several things not mentioned in this tome of higher knowledge which I'm going to share with you so that you can avoid making an ass of yourself on a public Mustang forum like
yours truly. The basic premise is this;
both heads are identical and don't have "sides". If they don't have "thermactor" holes, just put them on. Don't ask me what a "thermactor" is, I have no idea. Now here's the second gem of head-installation-lore; the edge of the gasket with the water jacket holes in the middle go to the back of the engine. The gaskets are identical and are usually marked with "Front" somewhere on them and can be flipped either way to fit their respective side. If the head gaskets are not made of metal, you don't need any kind of sealer on them. Finally, the head bolts ARE reusable. These are not "torque to yield" head bolts which are the type that aren't reusable. However, they do need to be cleaned to prevent binding and ensure a consistent torque. So, I cleaned my bolts with a wire wheel on my bench grinder making sure to get the threads cleared. I also chased the threads in the bolt holes in the block. Each bolt's threads were coated with
Permatex Teflon Thread Sealer. I chose this because it not only seals the threads, it lubricates them to allow for consistent and accurate bolt torque. Of course, the bolts had to be torqued in a particular order and in stages.
 |
| The heads are identical castings. |
 |
| Head bolts all cleaned up with wire wheel. |
 |
| Head gasket installed. Note the water passage holes at the back of the block. |
 |
| Threads sealed before insertion. |
 |
| Both heads are on and torqued! |
After the heads were on, it came time to insert the hydraulic valve lifters in their holes to contact the cam lobes. Before they can be tossed in a hole, they need to be primed by squiring oil into the side hole until it bubbles out the top hole. I just used a squeeze bottle with a red WD40 straw tucked into it's nozzle. The WD40 straw fit nearly perfect into the side hole but you really have to use a bit of constant force to inject oil into the passages of the lifter. Eventually, a little pool of oil will form in the top indention and you'll know the job is done. The lifter can then be lubed with oil (I used cam lube) and inserted in its hole.
 |
| A box of 16 new lifters. |
 |
| Primed with a fresh pool of oil on the top indention. |
 |
| All lifters primed, lubed, and inserted. |
Next, the push rods need to be inserted into the top of the head and down onto the lifters. I dug my set of rods out of the plastic tote and inspected them to ensure they were straight. Four of them were bent and needed to be replaced ($3.99 each at Baxters). The other twelve I cleaned up with lacquer thinner and then soaked them in a can of carb cleaner for about 30 minutes. When I removed them and wiped them down, and blew them out with my air compressor, they looked good as new. Better than the repros from Baxters even. Each rod was inserted into its hole and the cast rocker arms were placed on their pivots with a nut on top. I lubed each rod lobe and the tops of the valve stems at the contact points of the rocker arms first. "The book" has a great diagram and procedure for adjusting the rockers using 3 timing points on the harmonic balancer. I followed the procedure a couple of times checking and double-checking the rockers to make sure they were set right. The last thing I wanted to do was damage a valve or bend a rod the first time the engine is turned over. During about the 3rd time around, I noticed that the nuts on a few of the rockers were several threads lower on the stud than the others. I also noted that the plunger in the lifters of those were recessed further than the others so I pulled the respective lifters and re-primed them. Sure enough, bubbles came up through the holes in the top as though they were only half-full. After re-priming and reinstalling them, the rockers tightened to a more consistent position as the others so it's something to watch for I guess. I then squirted some lube around each of the lifter holes (can't hurt right?) and turned my attention to the intake manifold.
 |
| 12 old push rods all cleaned up.. the other 4 were bent. |
 |
| Push rods all snug in their lifters. |
 |
| The rocker nut on the right is much further down the stud? |
 |
| The plunger is depressed further on that one. I re-primed it. |
I used
Permatex Ultra-Black RTV around the water jacket holes on the gaskets and across the front and back of the block instead of using the factory style cork gaskets that are notorious for leaking. I also cleaned up the bolts and gave them the
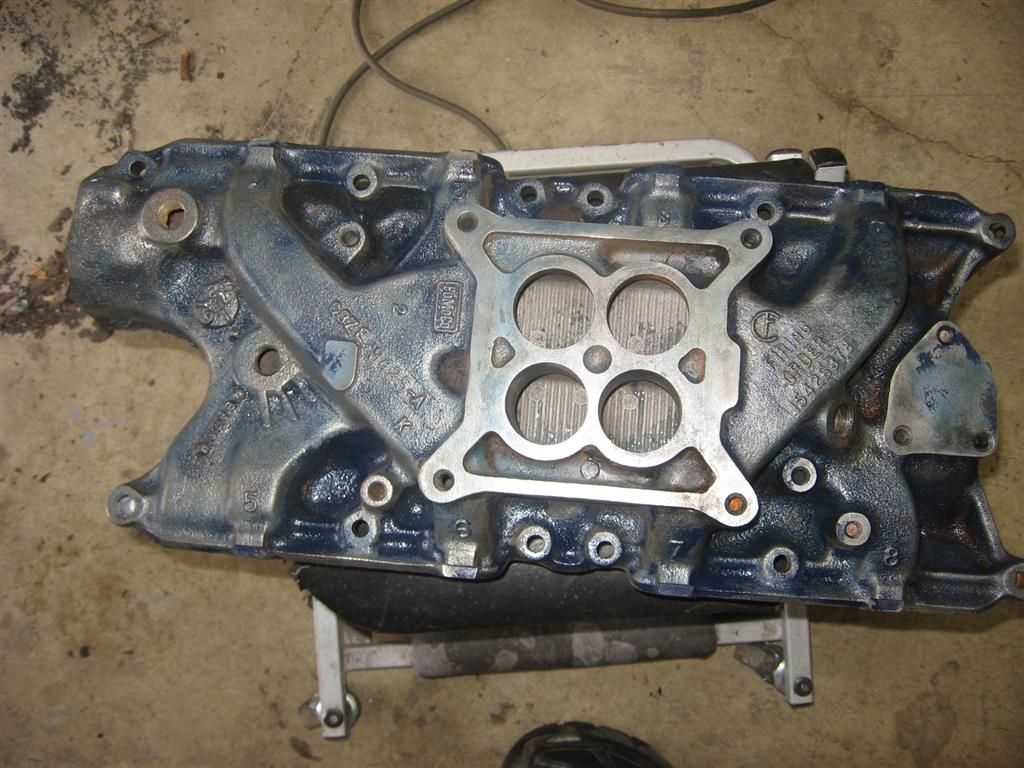
phosphate and oil treatment. Although the original engine came with a 2 barrel carburetor, I did some math and was shocked to discover that 4 is greater than 2 so I bought a 68 4 barrel manifold from a guy off Craigslist for $50. The new manifold had some rust but looked like the underside had been blasted. However I was boggled as to why the heat shield on the bottom of the manifold seemed askew. There was a large gap to one side that wasn't present on my old (dirty) manifold. Somebody had actually gone to the trouble of removing the spiral rivets to take off the heat shield and then put it back on backwards. !?? I was boggled by this. What type of mental state would one have to be in to know how to remove and reinstall spiral rivets but not notice that the shield was backwards? So, I removed said shield, cleaned the rivets and their holes, used some loctite on them, replaced the shield (correctly), and carefully hammered the rivets back into place. I cleaned up the top of the manifold with wire wheels and some ospho, repainted it, cleaned the mating surfaces thoroughly, and mounted it on the engine. Somehow, I positioned it perfectly over the bolt holes the first time, sealed the bolt threads, and torqued them down in stages and in torque sequence.
 |
| Intake gaskets and RTV in place. |
 |
| Old manifold compared to the "new" $50 4-barrel. |
 |
| Bottom side comparison. Notice that gap in the heat shield of the top one? |
 |
| Heat shield removed |
 |
| Turned it around correctly and re-riveted. |
 |
| Starting cleanup. |
 |
| Cleaned, painted, and torqued. |
After that minor victory, I stood back to admire my shiny new engine. Except for one problem. My valves were showing and we can't have that in polite society. My valve covers though, let's just say that they've done a LOT of covering during their lives. Filled with sludge and topped with rust, I actually considered buying new ones. The little accountant that sits on my shoulder calculating stuff all day took his stogy out of his goblin-like scowl, and screamed in my ear, "NO WAY!" so I grudgingly went to my tool cabinet, retrieved my scraper, and set to work. After literally hours with a scraper, wire wheel, degreaser, ospho, and lacquer thinner, I cleaned them up enough to repaint.
Finally, with much pomp and ceremony, I set them down upon the heads like royal blue crowns, bolted them down with shiny new valve cover bolts, and deemed the lions share of the rebuild, "Complete".
 |
| Inside "before" |
 |
| Outside "before" |
 |
| New valve cover gaskets "after" |
 |
| Dun Dun DONE! Now just little stuff. |
 |
| Remember me? |
This all literally would not have been possible if not for This little blue book. I highly recommend it to anybody that's never seen the inside of a 289 before.
So, that pretty much sums up the "Seeking Motorvation" series. Now all that's left are the little engine bits. I'll probably update this entry with a couple more pics later.


Awesome work Alex! I think I had that same book in 1980 when I was working on my 69 Mach 1 with a 351W. One thing I remember most when my friends would swap out the 2bbl intake with a 4bbl. They would throw a huge carb on top and couldn't understand why the car ran so crappy. Too much fuel and too much cfm and too little compression(stock block and heads). Called over carbing. The Autolite 4100 (400 cfm) might work best for your engine. 600 cfm might be the max. Once again, amazing work!
ReplyDeleteThanks James, that sounds like good advice. It's very likely that I'll look for a 4100 if I can find one cheap (rebuildable).
ReplyDeleteAbsolutely fantastic work...again. btw, do you know how to tell a 289 from a 302? I didn't see the answer on that (now famous) thread!
ReplyDeleteThanks! The engine block has "289" cast into it in the intake valley. It's also a C code car which is always a 289 2v engine.
ReplyDeleteA work of art Alex! Love those cast iron 4V manifolds. I ran one on the 289 I had stuffed in my Maverick many moon ago. Broke an ear off it during a rebuild but could never bring myself to toss it. Still sits on the garage shelf 20 years after I trashed it :/ I may have a 4100 sitting on an Edlebrock Torker in the basement. I'll check.
ReplyDeleteNope - just checked - it's a 4300. Probably off a 71-73 Cleveland. I ran it for awhile on the 289 but ended up with a Holley just 'cause it was easier to tune.
ReplyDeleterj
Ah well, thanks for checking RJ and thanks for the kind words.
ReplyDeleteNice work and a great post ! Next a visit to SteveA's to see how prepping has proceeded ?
ReplyDeleteThanks Ripa! I kind of give SteveA his space. He's pretty good at letting me know when he's reached a milestone.
ReplyDeleteWhen I rebuilt my 351W I just soaked the lifters in a large cup of motor oil over night. Don't recall having any issues when I installed the rockers.
ReplyDeleteIs that a new balancer I see on your motor? I had a bit of an issue there when installing my new one. Didn't look right to me on mine as there was a small gap from the back of it to the seal.
Monroe's book is one of the best investments one can make. As for you, it did a great job of guiding me through the teardown and rebuild of my 289. I still refer to the book from time-to-time, and I rebuilt my engine over ten years ago.
ReplyDelete@Mr Mumm, that seems like a good way to do it. I didnt notice a problem with the seal.
ReplyDelete@John, yup, it's definitely worth the 15 bucks! :-)
Great post Alex. I do need to get back to my engine reassembly still. Gotta get the heart into it though... I did the same as Mr Mumm with my lifters too by just soaking them in a cup of oil.
ReplyDeleteThanks Mike! I wish you guys could read my mind before I do a task and give me these pointers before I spend a half hour filling lifters with a squeeze bottle. LOL!
ReplyDeleteGreat blog... read through it all as I just recently bought my own mustang. It doesn't need the extensive work you've been doing, but I think I might tear into the heads over the winter... anyway, just wanted to say great job!
ReplyDeleteThanks Jared. Good luck with your new pony!
ReplyDeleteHi Alex, how are you? good post!! and about the 4100 autolite carb I need yo ask you how you get separated both inner and outer tubes from venturi cask (or cluster). Are they screwed? soldered? just pressed? and how you get them joint together again? I got my primary cluster and both inner tubes are too inside the outer from what other pics i saw on internet. I cant start my 351 engine, i can see no fuel on primary hole when i push primary diaphragm neither at most down hole (idle screw), the only way to start engine is throwing engine inside the hole (directly to intake manifold) and after consuming that fuel it stops. I ve cleaned all the carburetor and have replaced all with a new KIT for it, so i dont think that is any hole/line clogged except on that cluster...Hope you can help me, greetings!
ReplyDelete