Disclaimer: From here on out, you may notice that I'm re-using old, worn or tattered parts (like the various chrome bevels and such). I'm out of money for new parts to do a full-on restoration but I want to drive the car this Summer so I'm just cleaning up and refurbishing the original parts. I'll replace less-expensive rubber parts but generally, from here on out, things are going to go pretty fast and, sometimes, ugly. I intend to budget out some more money this Fall to finish the interior correctly. For now, the name of the game is "git 'er done".
With the electrical system in place, I could begin installing electrical gadgetry. One of the biggest gadgets under the dash is the windshield wiper assembly consisting of the wiper pivots and the motor and bracket. The pivots had to go in first and mine were caked in old paint and strip caulk so first I had to clean them up. I removed the old paint with a wire brush and meticulous use of an xacto knife and peeled away the old strip caulk. Besides the caulk, the pivots are sealed against the elements with leather gaskets that go between the pivot and the underside of the inner cowl. I opted for modern rubber seals but first I applied new strip caulk around the screw holes first. I mounted the pivots to the cowl with three bolts each.
 |
| Before cleanup. Original strip caulk and not-so-original paint. |
 |
| Cleaned up. |
 |
| New strip caulk |
 |
| New rubber seal |
 |
| Mounted up. |
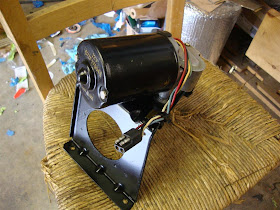
The wiper motor was a mess as well so I took apart the assembly, media blasted the bracket and various parts, cleaned up the motor, and repainted it all. I then put it all back together and mounted up under the dash by it's four mounting bolts and clipped the pivot actuator arms to the motor swing arm.
 |
| Before cleanup |
 |
| After cleanup (arm side) |
 |
| After cleanup (motor side) |
 |
| Mounted up. |
Next, I mounted the headlight and ignition switches. I covered the headlight switch pretty well when I
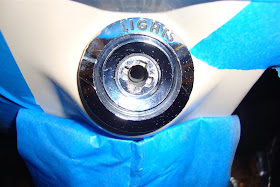
blogged it's removal. Basically, there's a center barrel that screws into the switch body and pulls the bevel against the dash and the switch body on the other side. The switch plunger can then just be inserted into the hole and locked in. Then the wiring harness is plugged in.
 |
| Switch body with inner bracket. |
 |
| Outer bevel and center barrel that screws into the switch body. |
 |
| Plug in the harness |
 |
| And re-insert the switch knob. |
The ignition is more simple still. There's an inner bracket that holds the switch body away from the inside of the dash while the bezel screws into the outside of the dash and pulls the switch body towards the dash. A screw is then driven up into the bracket from below and the harness connector is plugged into the back of the switch. There's a special tool for screwing the bezel onto the switch but I don't have one so I used a screw driver to catch one edge of one of the notches and carefully tightened it up.
 |
| The ignition switch assembly. |
 |
| Ready to go. |
I next took apart the washer pedal pump and masked off the sensitive areas. I then media blasted the pedal arm and the bracket. The pedal pivot was a major pain in the butt to remove and re-insert with the spring and the rest of the assembly was riveted so I opted to mask it off and work around the switch and pump bellows. The assembly was repainted and mounted back onto the firewall through the insulation pad and it's harness connector reattached. This car never came with the pedal pad so I have one on order.
 |
| Disassembled (before) |
 |
| Reassembled and painted. |
 |
| Back in it's place of honor. |
The driver side vent was yet another adventure in restoration. The inside of it was the host of a pack rat nest when I tore it apart so the flapper inside was a rusty mess. I removed the pivot shaft and flapper and carefully removed the rubber seal from around the edge of the flapper and then media blasted the metal parts and repainted them. I then reinstalled the rubber seal with contact cement. I used 3/4" foam rubber weather seal around the mounting flange since the original seal was long gone. The cable was another adventure in that it was broken. A little research revealed that these plastic cables are horribly designed and prone to self-destruction. New cables are around $40 each so I opted to employ my old friend "Shoo Goo" and applied it in such a way that it will have to be ground off the bracket if I ever choose to replace this cable with a new factor cable. I gave the "fix" a fair abuse test and it held up well and showed no signs of letting go of the plastic cable housing nor the metal bracket so I'm just going to go with it... and if anybody has a used one of these cables that's in serviceable condition for around $20 shipped, let me know (but I won't hold my breath).
 |
| Repaired flapper and new weather seal. |
 |
| Side view with "fixed" cable. |
 |
| All mounted up. |
Next, the emergency brake handle assembly was taken apart, media blasted, and painted and a new handle was installed since my original was broken in half. A short length of rubber hose was pushed down at an angle in the slot below the steering wheel firewall hole and it was sealed in with some seam sealer. From the bottom of the car, a new emergency brake cable was mounted to the firewall via two sheet-metal screws through a bracket. The cable housing was then routed underneath the floor to it's mounting bracket with the cable routed on through the tunnel support and connected to the emergency brake cable actuator. Under the dash, the cable was linked to the e-brake handle which was then bolted to the firewall on one end and under the dash with the same mounting screws used for the vent cable knob.
 |
| Parking brake handle assembly cleaned up with new handle. |
 |
| Cable routed through the firewall. |
 |
| Cable housing routed below the floor. |
 |
| Cable routed through the tunnel support to the e-brake actuator. |
.
 |
| Connected to the e-brake handle which is bolted to the firewall on one end. |
 |
| And the dash on the other. |


Awesome!
ReplyDeleteThanks James!
DeleteLove the disclaimer ! Great job !
ReplyDeleteThanks Risto!
DeleteAnother batch of excellent documentation. You reminded me I have yet to take out my wiper motor/linkage. You know...out of sight...out of mind. Your old parts look great. I wish mine were that salvagable. Nice work!
ReplyDeleteThanks Dennis! If you don't already have one, get a blast cabinet. You'll be surprised what can be salvaged with new paint.
DeleteI snagged one on Craigslist back in April for $70! It even had glass bead media in it and was on a stainless steel cart. When I get to the point you are, I figure I'm going to be putting that bugger to work!
DeleteOh that's right. You even did a blog entry about it and I asked if you sealed the seams. Awesome deal!
DeleteMan on a mission. Ugh the windshield wiper motor...the stories I could tell. I must have spent an entire summer a few years back - upside down trying to get that stupid bracket with the 4 bolts in it, back in position. I don't recall why it was so difficult but I ended up making a special wrench to get at one of them. My Dad always says the wiper motor is the first thing down the production line and they build the rest of the car around it. Great progress!
ReplyDeleterj
Thanks RJ. I had trouble with the outside two bolts even with everything out of the way. It's like the mounting points are just 1/16" off or something. I'll bet it's a bugger with the dash assembled.
Delete