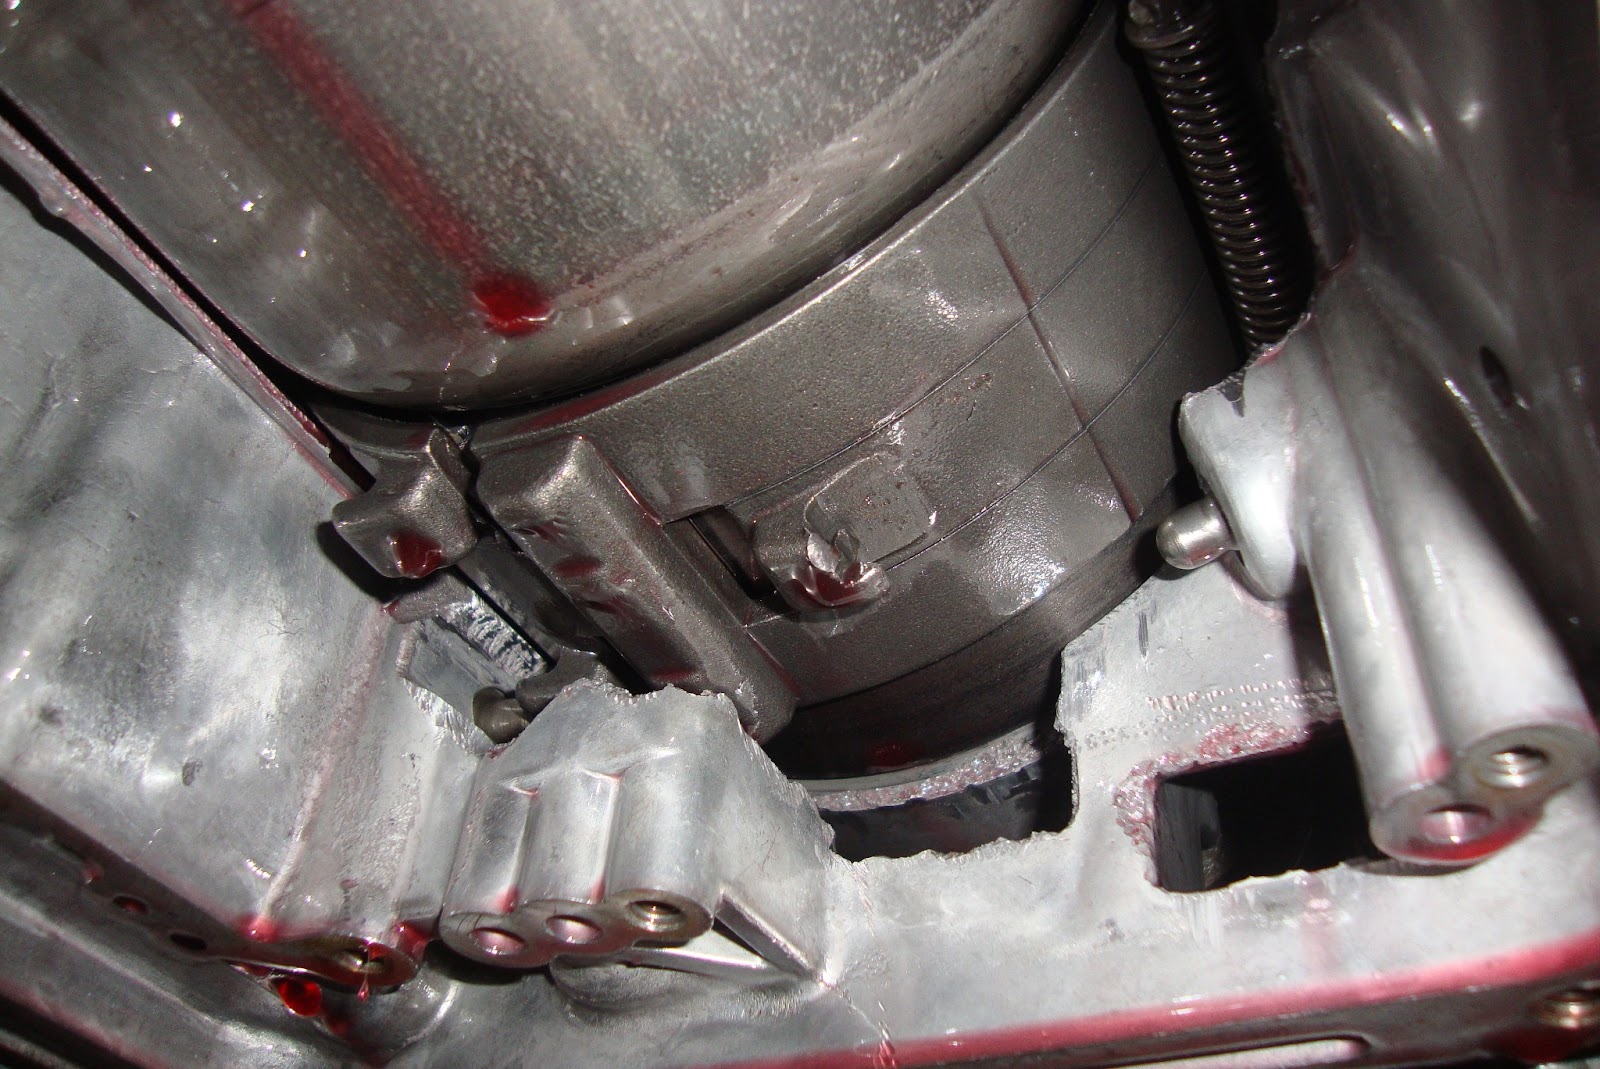
Toward the middle of September, the car was running pretty nicely so I went to take the wifey out on an evening cruise. The car was parked nose-down on my relatively steep driveway and I put the shifter in reverse, released the parking brake and gave it some gas. It rolled up the hill about 2 feet at which time it made a *CHUNK!-CLANG!* noise and started rolling *forward* back down the hill (fortunately, my garage door was open so it just rolled into the garage bay instead of into the door). My heart sank because I immediately suspected a serious mechanical failure in my freshly rebuilt C4. I ran the shifter through the gears and could hear the reverse servo engaging but no reverse. The forward gears worked though. This told me that something happened to the band or the reverse clutches. The best I could hope for is that the cast-iron strut that goes between the servo pin and the reverse band had broken and could be replaced. The worst was that I'd have to tear the C4 apart and replace the band, the reverse carrier, or low/reverse drum. The only way to know for sure was to crawl under the car and drop the pan and valve body and take a look-see.
Sure enough the strut had broken and dropped into the pan and it took a part of the band's strut guide with it. Craaap... I was hoping never to get to experience dropping the trans out of the bottom of the car but it looked like that's exactly how I'd be spending my week. I went down to Harbor Freight and bought their less-expensive tranny jack and set to work removing everything in the way including the trans cooling lines, the exhaust Y-pipe, the drive shaft, the trans cross-member, the speedo cable, linkage, and a half-dozen other odds and ends.
I had also decided that as long as I was this far, I'd drain the torque converter (TC) because it would make the transmission lighter and also because I had been running Dextron to this point. Although I don't think it had much to do with this issue, I decided to go back to good old fashioned type F fluid. I then removed the four nuts that held the TC to the engine flex plate. To drain the TC without making a mess in the bell housing, I made a kind of butterfly shaped funnel out of an old ATF bottle and removed the drain plug. The ATF then drained neatly into my catch pan. I put the pan back on to support the trans on the jack and worked the transmission back and down with little drama. UNTIL... I realized that the trans jack I bought is way too high to allow the transmission to roll out from under the car. The deck is like 8 or 9 inches off the floor! So the transmission had to be carefully rolled off the jack and slid out from under the car. I'd have to lift the car about another foot to make it clear and my stands just don't go that high (and I wouldn't trust them if they did).
 |
| Daaaaaaaamn... |
 |
| Draining the TC |
 |
| Jacking the engine down. Look how huge that strap winch is. It really doesn't fit in a tunnel very well. |
I then started tearing down the case, first removing the bell housing which also frees up the front pump. These transmissions are best worked on in a vertical position and since I didn't want to spend the time or money building a proper work jig, I just did what anybody would do, I stuck it atop a tubing bender frame and strapped it to a post. I lifted the stack of clutches and input shell off of the low/reverse drum. The broken band could then be removed and and replaced (after soaking the new one in ATF for a half-hour or so). The new strut was placed on the servo pin and adjusted to 3 turns out and while I was at it, readjusted the intermediate band to 1 3/4 turns out.
I then re-assembled the transmission, put two quarts of fluid in the TC and re-installed it on the input shaft, slid it back under the car, and... how the hell was I going to lift it back up onto the jack? I didn't have enough room to lift it by hand and am not strong enough to lift it while laying on my back in the first place. So I worked it up a stack of blocks on each end lifting the front, setting on a block, lifting the back, setting it on a block, lifting the front, setting another block on the first, then moving to the back and so on and so-forth until the jack fit under the transmission. And then the cursing started! The jack deck was very slick and the tie-down winch was too big to be tightened (or released again once the transmission is on the engine) in the enclosed space of the tunnel. Also, the tie-down strip actually pulls the roller under the deck of the jack out of it's groove so one side of the scissor jack starts to sag. All in all it was a god-awful experience but I finally got the transmission back in the car despite that POS.
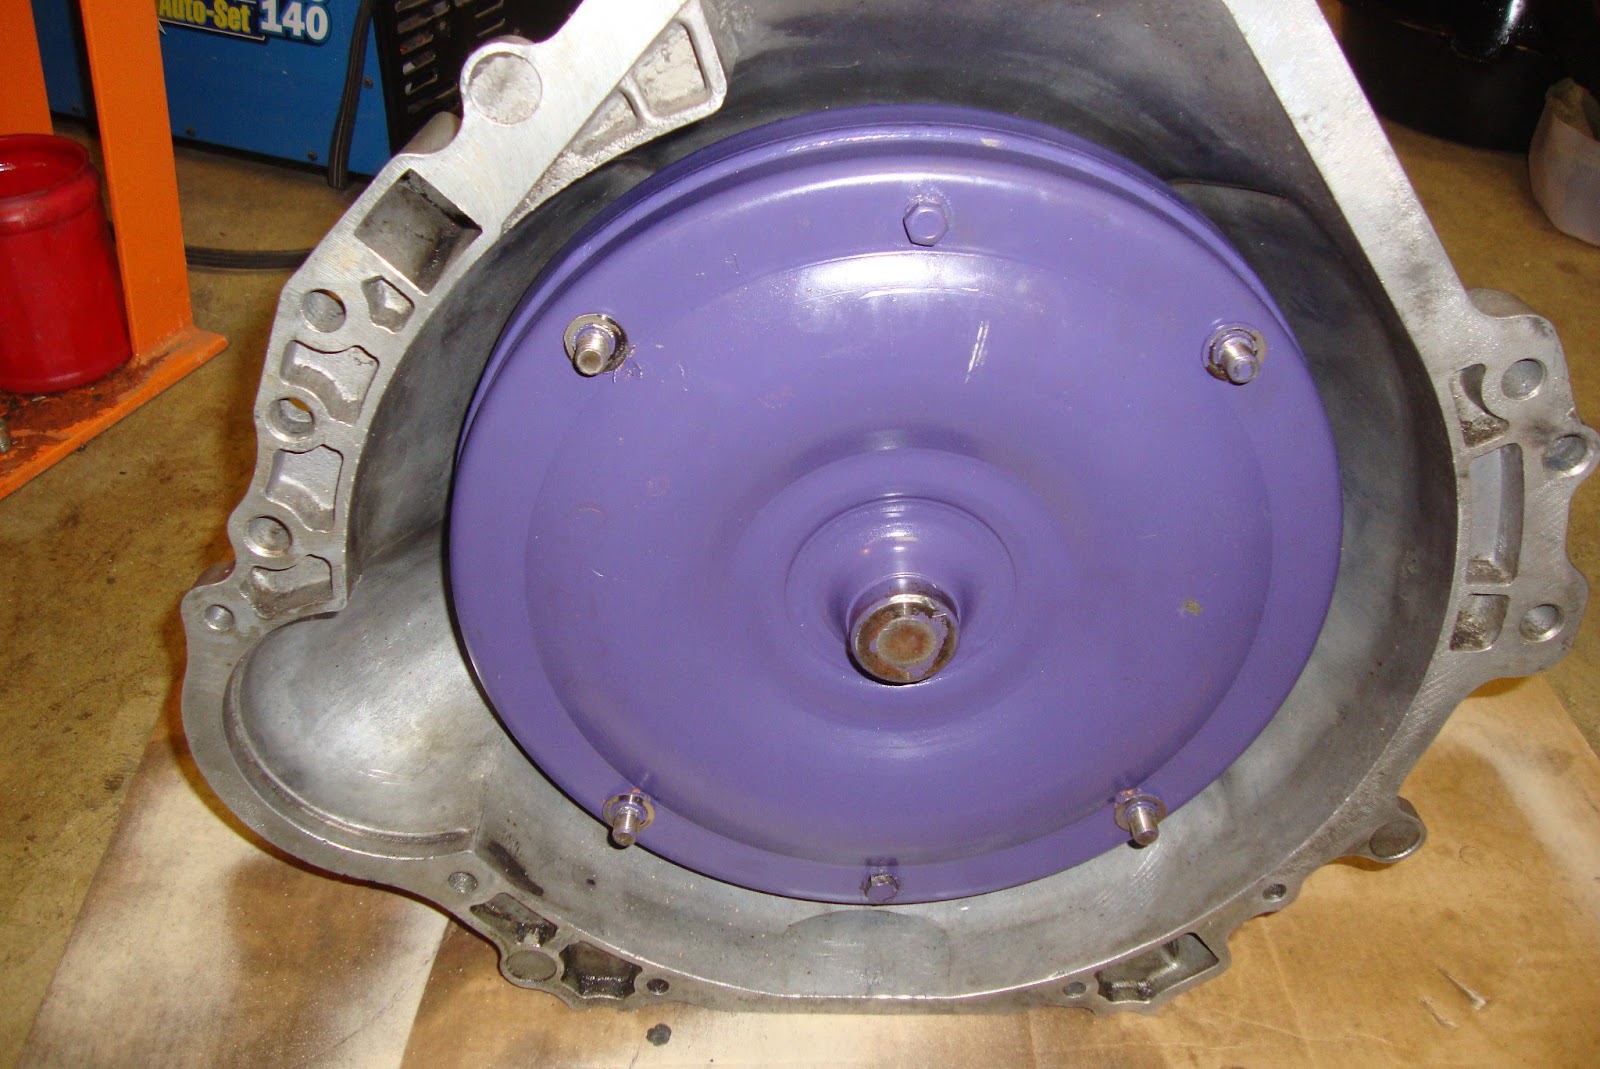
Before mating the trans to the block, however, it was important to pre-align the flex plate studs with their holes by orienting the TC drain plug to the bottom-center of the bell housing and orienting the engine flex plate drain hole in the same bottom position. A couple of tricks to try (which I didn't use) are to put a piece of rubber hose on the TC drain plug and run the hose into the drain plug hole in the flex plate, and you can temporarily insert a couple of bolts with the heads cut off into the block mounting holes to help in aligning the bell housing to the block.
 |
| Pulled apart |
 |
| Strapped to my eeeeevil transmission torture rack. |
 |
| The new band installed with a new strut. |
 |
| The part that broke. I actually worked pretty hard to find all the pieces. |
 |
| TC installed with drain plug oriented to the bottom, center. |
 |
| Finally got it back on the jack deck. TC and flex plate both pre-oriented. |
Finally, I hooked all of the various parts back up, started the engine, finished adding fluid. Checked for leaks (none!!) and tested the gears. Test results: A-OK!
So, the $24,000,000 question is, "why did the band break?". I think the answer is that I didn't have the reverse band adjusted correctly the first time. I think it was too far in by about a half turn. That, coupled with a brand new, super strong servo, and SNAP! That's all I hope it was though. I'd really hate to do this again in a couple hundred miles.


